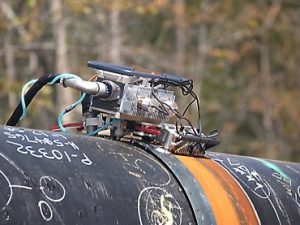


U-SONIX’s Automated Ultrasonic (AUT) inspection services are advanced, accurate, and effective techniques to monitor discontinuities over successive inspection intervals, calculate growth rates of discontinuities, and plan repair or replacement activities.
In the last several years, automated ultrasonic testing (AUT) has begun overtaking conventional radiography as the pipeline weld inspection method of choice throughout the world. Radiography has significant limitations: Not recommended for planar defects, no vertical sizing capability, safety issues, and environmental concerns.
AUT inspection supplies highly-accurate data as an important tool for implementing Risk Based Inspection (RBI) programs, Fitness-for-Service (FFS) Analysis, and remaining useful life programs. These advanced non-destructive testing (NDT) inspection techniques are also widely-used in capital projects, turnaround scheduling/planning, and shutdown/outage projects.
Automated Ultrasonic Testing (AUT) Inspection System to carry UT NDT welding inspection of girth welds during the construction of cross-country and long-distance pipelines. Developed for both onshore and offshore NDT pipeline inspection, the AUT weld inspection system can detect and measure welding imperfections within the weld and associated heat-affected zone, determining both the circumferential length and the through-thickness dimension. The system couples a low false-call rate (FCR) with flaw-sizing capabilities, a user-friendly presentation in colour using customised software and storage of results.


Merits of Automated Ultrasonic Testing (AUT)

+91 63839 92501
admin@u-sonix.com